Your first agent
Now that sectr CLI is installed and authenticated, let’s get your first agent up and running: a customer support agent that can look up orders and issue refunds with admin approval.
Project Setup
Section titled “Project Setup”Scaffhold a runnable project that sets up Sectr with the OpenAI Agents SDK adapter:
sectr init my-agentThis generates the following project layout:
my-agent/├── sectr.toml # <-- The Sectr manifest├── app.py # <-- OpenAI Agents SDK code + a Sectr endpoint├── tools.py # (tool definitions)├── fake.py # (mock model)├── pyproject.toml├── .env.example # copy to .env to setup an OPENAI_API_KEY└── .gitignoreThe agent
Section titled “The agent”Using Sectr is as easy as writing the agent code you are already familiar with, and then exposing it on a Sectr route. No special frameworks or code patterns are required.
Agent defintions and routes
Section titled “Agent defintions and routes”Let’s take quick look at app.py, where we define the agent and its Sectr route:
from agents import Agentfrom sectr import AgentAppfrom sectr.adapters.openai_agents import openai_agents
from fake import setup_modelfrom tools import lookup_order, refund
model = setup_model()
agent = Agent(    name="support",    instructions=(        "You are a customer-support agent for a small shop. "        "Look up order status with the lookup_order tool, "        "and issue refunds with the refund tool."    ),    tools=[lookup_order, refund],    model=model,)
app = AgentApp(name="my-agent", env=["OPENAI_API_KEY"])app.add_route("/chat", openai_agents(agent, model=model))
First, you define your Agent using standard OpenAI Agents SDK code. You don’t have to do anything different here: this is the agent code you already write, no special SDK or domain specific language needed. Sectr is designed to be agnostic to the agent framework, with more coming soon.
Second, you simply expose your agent as a route on your Sectr app. Thats all.
Notice what’s absent: no session handling, no streaming plumbing, no state management, no Postgres queries to persist conversations. Sectr provides that, so you can focus on the AI.
Tool Defintions
Section titled “Tool Defintions”The tools are vanilla OpenAI Agents SDK tools, defined in tools.py:
from agents import function_tool
@function_toolasync def lookup_order(order_id: str) -> dict[str, str]:    ...
@function_tool(needs_approval=True)async def refund(order_id: str) -> str:    ...
Note that the refund tool is marked with needs_approval=True. Sectr automatically handles human-in-the-loop (HITL), suspends your agent’s execution, and elevates the request to allow for approval within the Sectr dashboard. It doesn’t matter how long an approval takes: even weeks later, Sectr will resume execution of your agent after an approval.
Run it locally
Section titled “Run it locally”If you want to use a live OpenAI model, just cp .env.example .env, and then put in your OPENAI_API_KEY in the .env file. If you don’t, then the example uses a mocked LLM.
Once you have your OpenAI API key setup, start the local dev server:
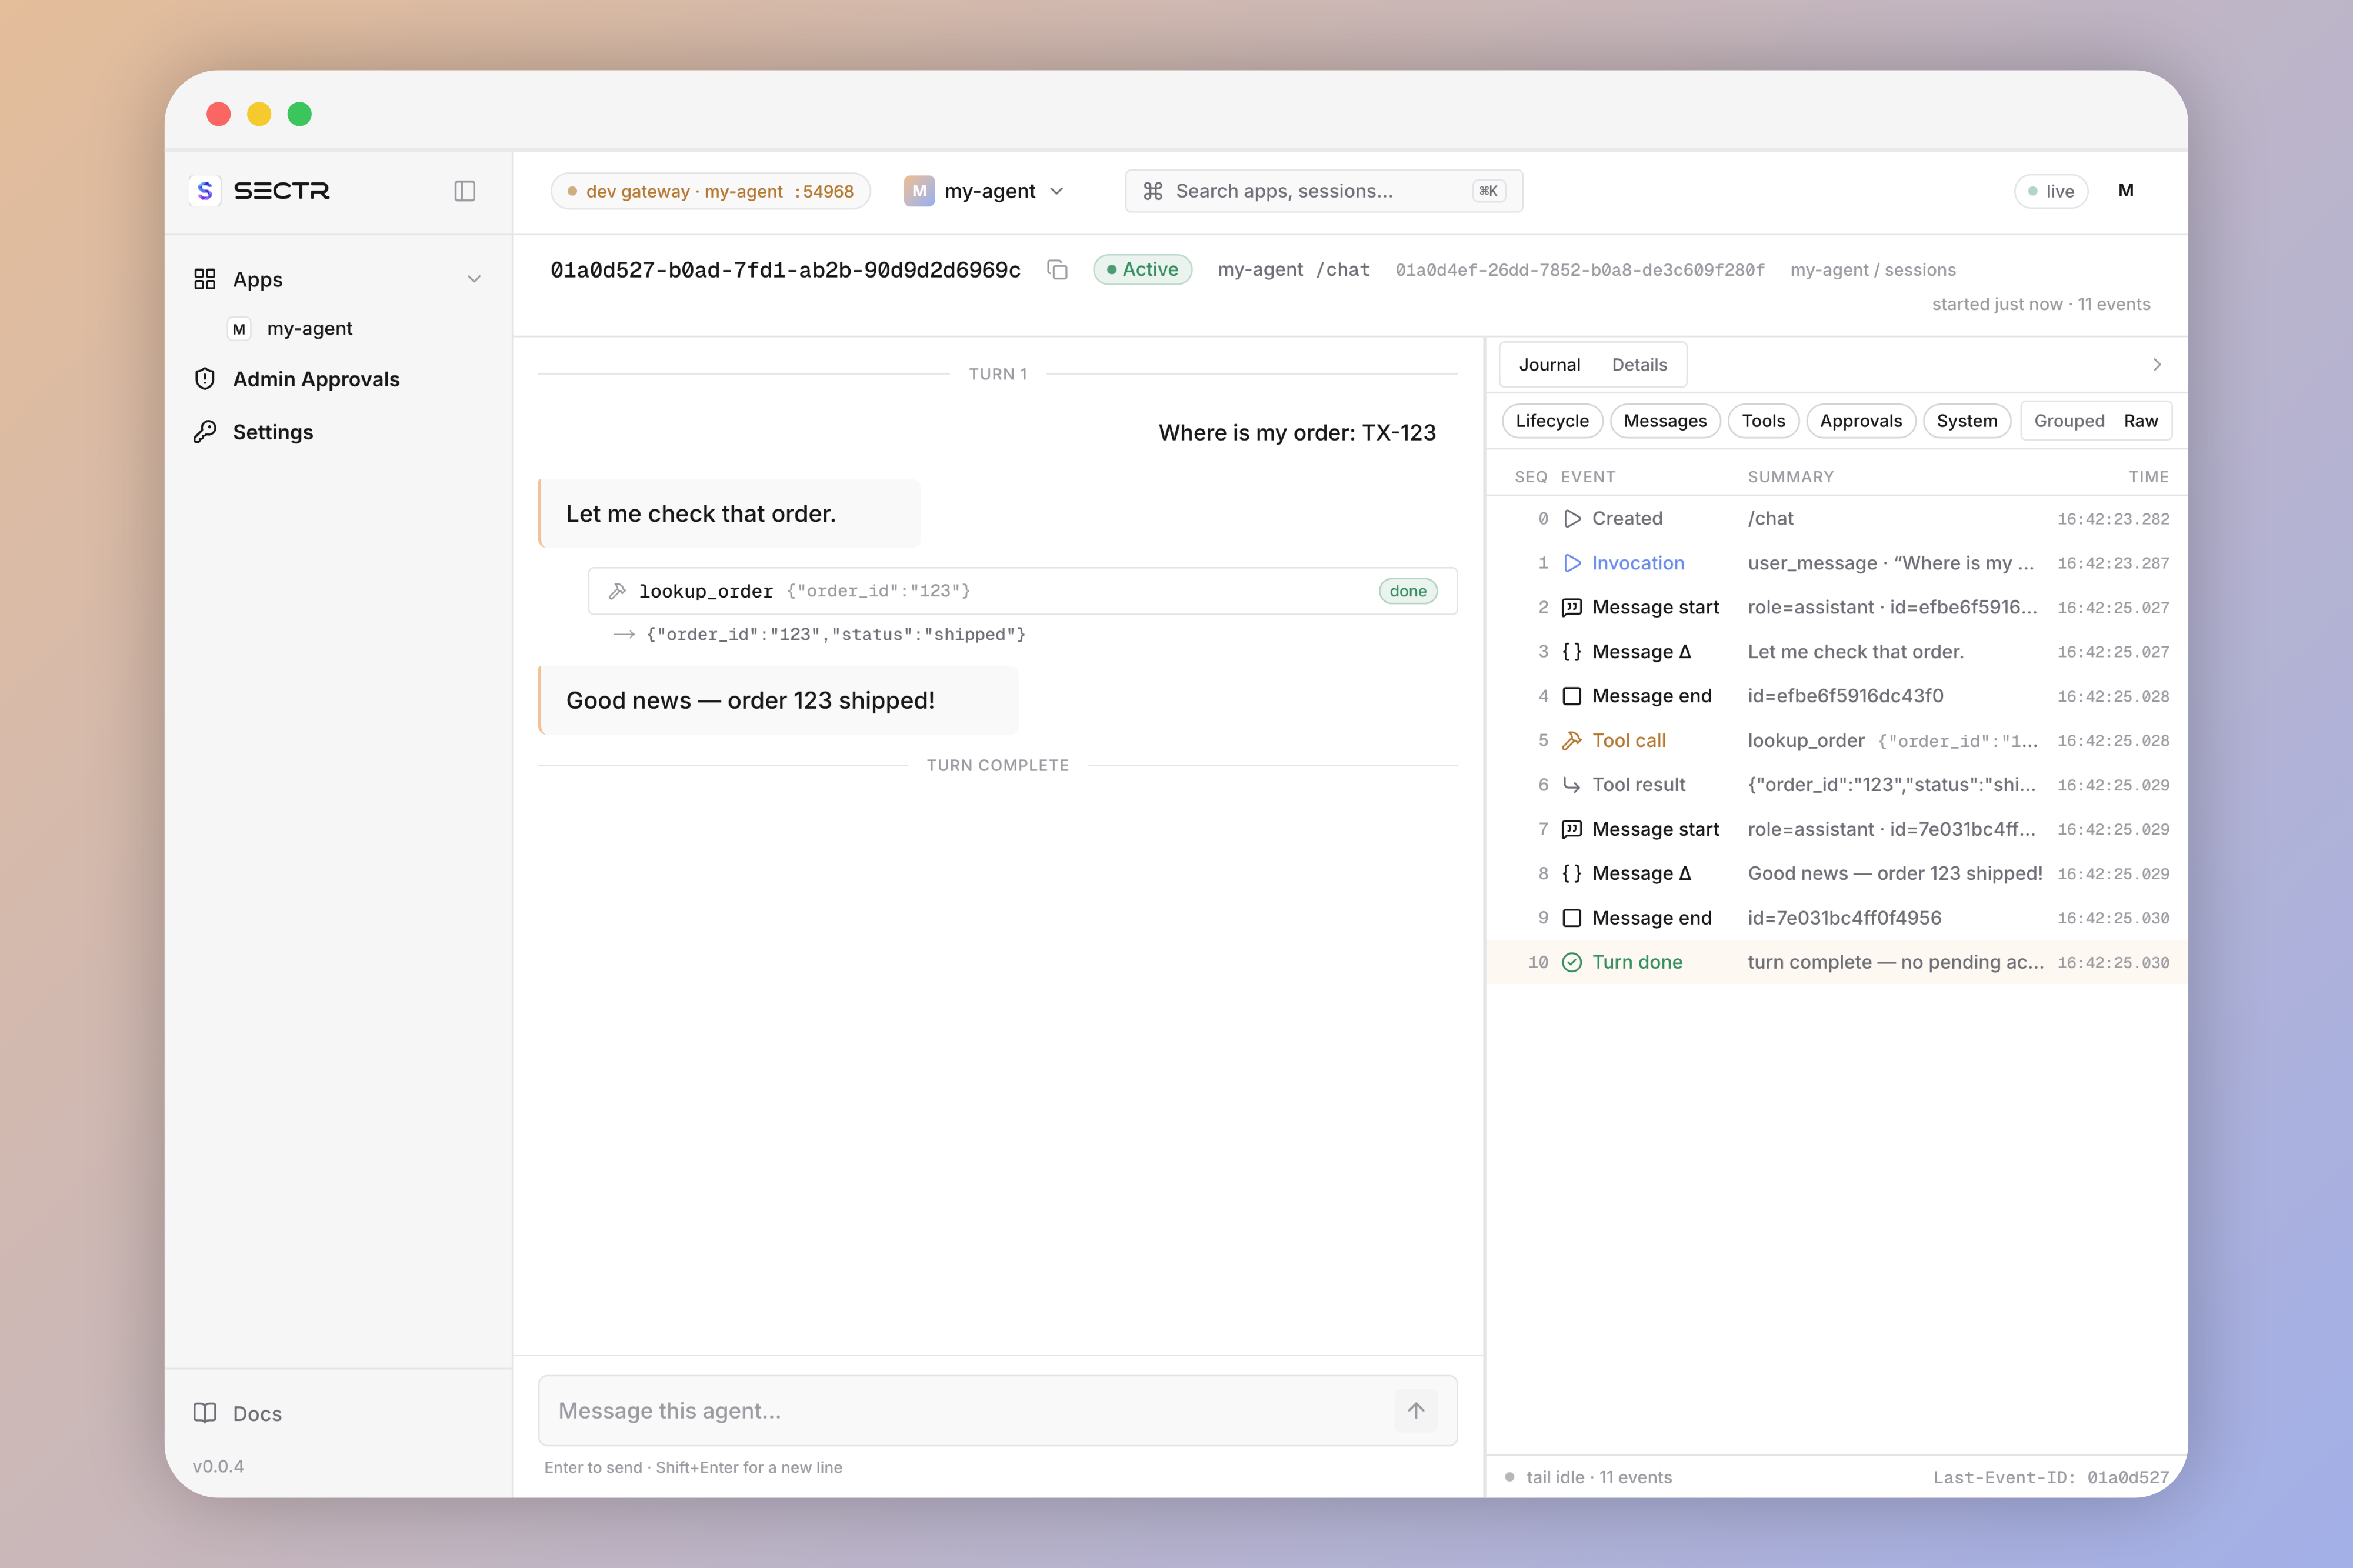
# cd my-agent (if not already there)sectr dev # Opens up a live dashboard for local dev serverThis opens up a live playground, where you can immediatley chat with your agent, observe its actions, test out, and iterate on its behavior:
Deploy your agent
Section titled “Deploy your agent”To move your agent from running on your laptop to being cloud-deployed, all you need to do is run sectr deploy from your project directory:
$ sectr deploypackaging .uploading to https://api.sectr.dev/deploymentsdeployment 01a0d532-d771-7563-96bd-56f40cb28b2b: version 1 - building🚀 view live at: https://app.sectr.dev/apps/01a0d365-aa51-78d3-97f9-a2a02bcc00ceThis performs a cloud build of your agent, analyze its routes, and deploys it as a live HTTP endpoint on Sectr. You can jump straight to view it in the Sectr production dashboard at that URL.
You can then setup set your OPENAI_API_KEY as an encrypted secret for your app in the Sectr Dashboard at Settings → Secrets, and chat with your cloud-deployed support agent.